


Panel Series
Using red light therapy effectively for hair growth requires the right device, consistent sessions at the correct frequency, clean scalp preparation, and realistic timeline expectations. The standard clinical protocol is 630–670 nm wavelengths, 15–25 minutes per session, 3–5 sessions per week, with results beginning at 8–12 weeks (reduced shedding) and density improvements visible at 16–26 weeks. Device coverage, treatment distance, and combination with other hair loss treatments all significantly affect outcomes. This guide covers everything you need to run an effective at-home protocol.
Before You Start: Is Red Light Therapy Right for Your Hair Loss?
Red light therapy works by stimulating existing hair follicles — it cannot regenerate follicles that have been permanently lost. Before investing in a device and protocol, it helps to understand which type of hair loss you have and whether red light therapy is likely to help.
| Hair loss type | RLT likely to help? | Notes |
|---|---|---|
| Androgenetic alopecia (male pattern) | Yes — strong evidence | FDA cleared; start early for best results |
| Androgenetic alopecia (female pattern) | Yes — strong evidence | Multiple RCTs confirm density improvement |
| Telogen effluvium (stress/postpartum shedding) | Likely helpful | May accelerate re-entry into anagen phase |
| Alopecia areata | Limited evidence | Consult dermatologist; autoimmune mechanism |
| Scarring alopecia | No | Follicles permanently destroyed; nothing to stimulate |
| Complete baldness (long-standing) | Unlikely | Follicles likely miniaturized beyond response |
If you are unsure which type of hair loss you have, a dermatologist can assess whether follicles are still viable and whether red light therapy is an appropriate addition to your treatment plan.
Choosing the Right Device
Device selection is the single most impactful decision in your protocol. An underpowered or inaccurate device will not produce clinical results regardless of how consistently you use it.
What to look for
- FDA 510(k) clearance for hair loss — specifically for androgenetic alopecia. This is different from "FDA registered." Cleared devices have been reviewed for their specific hair growth indication.
- Wavelength: 630–670 nm — this is the primary evidence-backed range for hair follicle stimulation. Near-infrared (810–850 nm) may add circulatory benefits but is not the primary driver.
- Third-party verified output — the device should publish irradiance data at stated treatment distance, verified by independent spectrometer testing.
- Full scalp coverage — the device must cover your entire treatment area consistently. This is the most common failure point with handheld devices.
Device types compared
| Device type | Coverage | Ease of use | Best for |
|---|---|---|---|
| Helmet / cap | Full scalp — hands-free | High — wear and go | Diffuse thinning, full scalp treatment |
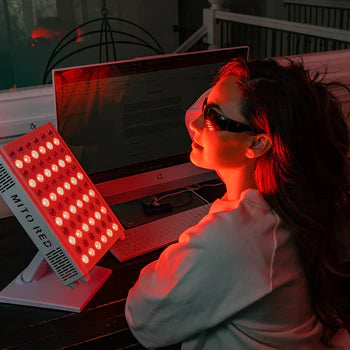
| Panel (positioned overhead) | Full scalp — requires positioning | Medium — sit under panel | Users who already own a panel device |
| Handheld comb / wand | Partial — spot treatment only | Low — must move continuously | Targeted areas; not ideal for diffuse loss |
For diffuse androgenetic alopecia across the scalp, a helmet or cap is the most practical at-home device because it delivers consistent, hands-free coverage across the entire treatment area without the inconsistency of manual movement.
The Protocol: Step by Step
Step 1 — Scalp preparation
Light penetration to the follicle is the goal. Anything between the LEDs and your scalp reduces the dose reaching the follicle.
- Wash and dry your hair before the session — clean scalp, no product buildup
- Remove styling products, dry shampoo, scalp serums, and any leave-in treatments before treatment
- Part the hair to expose the scalp where coverage is thinnest if using a handheld device
- Do not apply minoxidil or other topicals before the session — apply them after
Step 2 — Session
- Position the device according to manufacturer instructions — helmets should sit flush against the scalp
- For panels, position the top of your head 6–12 inches from the panel surface (follow your specific device's stated treatment distance)
- Session duration: 15–25 minutes for most devices — follow your device's specific protocol
- Relax during the session — the treatment is painless and silent
- Do not exceed the recommended session time — photobiomodulation has an optimal dose window and overdosing blunts the effect
Step 3 — Post-session
- Apply minoxidil or other prescribed topicals immediately after the session while scalp circulation is enhanced
- Avoid washing the scalp for at least 4 hours post-session to allow topicals to absorb
- Style as normal
Frequency and Schedule
| Phase | Frequency | Notes |
|---|---|---|
| Months 1–6 (active treatment) | 3–5 sessions per week | Every other day is the standard clinical protocol |
| Month 6+ (maintenance) | 2–3 sessions per week | Reduce frequency once density goals are met |
Daily use is acceptable but provides diminishing returns — the follicle stimulation effect does not scale linearly with increased frequency. Consistency over months matters far more than maximising sessions per week. Missing a day here and there does not significantly set back progress; missing weeks does.
What to Expect Week by Week
| Timeframe | What to expect |
|---|---|
| Weeks 1–4 | No visible change. Cellular activity is beginning but hair growth cycle is slow. Do not stop. |
| Weeks 5–8 | Possible initial shedding increase — this is normal. Follicles transitioning into active growth phase shed the old hair first. |
| Weeks 8–12 | Reduced shedding — less hair in the shower and on the pillow. This is the first measurable sign of progress. |
| Weeks 12–20 | Early density improvement — hair feels thicker. New growth visible along hairline or parting in some users. |
| Weeks 20–26 | Clear density improvement visible in photos. Continued thickness increase. Most users see peak early results here. |
| Month 6+ | Continued improvement with ongoing maintenance. Results plateau then gradually reverse if treatment is stopped. |
The most important note on week 5–8: an initial increase in shedding after starting red light therapy is normal and does not mean the treatment is failing. It reflects follicles transitioning from telogen (resting) into anagen (active growth) — the old hair sheds to make way for the new growth cycle. Many people stop treatment at this point, which is the worst time to stop. Push through to week 12 before drawing any conclusions.
Combining Red Light Therapy with Other Treatments
Red light therapy is most effective as part of a multi-modal approach. The treatments below address different mechanisms and combine well with LLLT.
Minoxidil
The most studied combination. Minoxidil is a vasodilator that prolongs the anagen phase and increases follicle size. Red light therapy enhances circulation and cellular energy. They work through different but complementary pathways. Apply minoxidil after your red light session — not before — so light penetration to the scalp is unobstructed. Multiple studies have shown combination therapy outperforms either treatment alone.
Finasteride (prescription)
Finasteride blocks DHT, the hormone that drives follicle miniaturization in androgenetic alopecia. Red light therapy does not address DHT, so the two treatments are fully complementary. For men with androgenetic alopecia, the combination of finasteride + minoxidil + LLLT is the most evidence-supported multi-modal approach available without medical procedures.
Microneedling
Scalp microneedling (dermaroller or dermapen at 0.5–1.5mm) creates micro-injuries that trigger growth factor release and improve topical absorption. When combined with red light therapy, the sequence matters: do microneedling first, apply minoxidil, then use red light therapy to support healing and cellular repair. Do not microneedle more than once per week. Allow 24–48 hours before the next red light session after microneedling on the same area.
Scalp massage
Daily scalp massage (4–5 minutes) has independent evidence for improving hair thickness by stretching follicle cells and improving dermal papilla circulation. It pairs well with red light therapy and adds no cost. Do it post-session while scalp circulation is elevated.
Tracking Progress
Hair density changes are gradual and nearly impossible to perceive day-to-day. Without a systematic tracking method, most people either miss real progress or give up before results appear.
The photo protocol
- Take photos every 4 weeks — not more frequently
- Same location, same lighting (natural daylight, no flash), same camera distance every time
- For the crown: photograph straight down from above
- For the hairline: photograph straight on at forehead level
- For the parting: part in the same place each time and photograph the width of the parting
- Keep all photos in a dedicated folder — compare month 1 to month 6, not day to day
What to measure
- Shedding count — count hairs lost in the shower once per week. A decrease from baseline (typically 100–150 hairs/day) is an early positive signal
- Parting width — a widening parting is a reliable visual indicator of androgenetic alopecia progression or reversal
- Hair shaft diameter — hair feels thicker before it looks denser; note changes in texture
Troubleshooting: Why You Might Not Be Seeing Results
| Problem | Likely cause | Fix |
|---|---|---|
| No change at 8 weeks | Normal — too early | Continue to 16–26 weeks before assessing |
| More shedding at weeks 5–8 | Normal transition shedding | Do not stop — this precedes regrowth |
| No change at 26 weeks | Device quality, frequency, or coverage | Verify device irradiance; check session frequency; assess coverage area |
| Results plateau after 6 months | Normal — add complementary treatment | Add minoxidil, microneedling, or consult dermatologist |
| Results reversed after stopping | Expected — maintenance required | Resume treatment; switch to maintenance frequency |
| Scalp irritation | Excessive session duration or frequency | Reduce session length; take a rest day; check for product sensitivity |
Mito Red Light hair devices
Third-party verified wavelength and irradiance output
All Mito Red Light devices are independently tested for actual wavelength output and irradiance at stated treatment distance. View the full testing results before you buy.
Frequently Asked Questions
How do I use red light therapy for hair growth?
Start with clean, product-free hair. Position a helmet, cap, or panel to cover the scalp area you want to treat. Run a 15–25 minute session 3–5 times per week. Apply minoxidil or other topicals after the session, not before. Take monthly progress photos in consistent lighting. Expect reduced shedding at 8–12 weeks and visible density improvement at 16–26 weeks. Maintain treatment ongoing — results decline when treatment stops.
How long should each red light therapy session be for hair?
15–25 minutes per session is the standard range used in clinical studies. Follow your specific device's protocol — some devices are calibrated for shorter sessions at higher irradiance. Do not exceed the recommended session time. More is not better; photobiomodulation has an optimal dose window and overdosing can reduce effectiveness.
Should I use red light therapy before or after minoxidil?
After. Apply red light therapy first on a clean scalp, then apply minoxidil immediately after the session while scalp circulation is elevated. This improves minoxidil absorption and ensures no product layer between the LEDs and the follicle during the session.
Why is my hair shedding more after starting red light therapy?
Initial increased shedding in the first 4–8 weeks is a normal and expected response. It reflects hair follicles transitioning from telogen (resting) into anagen (active growth) — old hairs shed to make way for the new growth cycle. This is called a "dread shed" and it precedes regrowth. Do not stop treatment at this point. If shedding is severe or continues beyond 10–12 weeks, consult a dermatologist.
Can I use a regular red light therapy panel for hair growth?
Yes — if the panel emits 630–670 nm wavelengths and delivers adequate irradiance, it can be used for scalp treatment by positioning the top of your head at the correct treatment distance. The limitation is consistency of coverage — you need to ensure the entire scalp treatment area is within the effective zone, and you need to stay still for the session duration. A dedicated helmet provides more reliable hands-free coverage for this application.
How long do I need to keep using red light therapy for hair?
Ongoing maintenance is required. Androgenetic alopecia is a progressive condition driven by genetics and hormones — red light therapy manages it while treatment continues but does not cure the underlying cause. Most users shift to a maintenance protocol of 2–3 sessions per week after achieving their density goals, rather than stopping completely.
References:
1. Leavitt M, Charles G, Heyman E, Michaels D. HairMax LaserComb laser phototherapy device in the treatment of male androgenetic alopecia: a randomized, double-blind, sham device-controlled, multicentre trial. Clinical Drug Investigation. 2009;29(5):283–292. pubmed.ncbi.nlm.nih.gov/24527939
2. Jimenez JJ, Wikramanayake TC, Bergfeld W, et al. Efficacy and safety of a low-level laser device in the treatment of male and female pattern hair loss. American Journal of Clinical Dermatology. 2014;15(2):115–127. pubmed.ncbi.nlm.nih.gov/24920481
3. Afifi L, Maranda EL, Zarei M, et al. Low-level laser therapy as a treatment for androgenetic alopecia: a systematic review and meta-analysis. Journal of the American Academy of Dermatology. 2017;77(2):363–371. pubmed.ncbi.nlm.nih.gov/31638696
4. Hamblin MR. Photobiomodulation for the management of alopecia: mechanisms of action, patient selection and perspectives. Clinical, Cosmetic and Investigational Dermatology. 2019;12:669–678. pubmed.ncbi.nlm.nih.gov/31576622
This article discusses published scientific research and general educational information about photobiomodulation and red light therapy. It does not constitute medical advice and does not make specific claims about Mito Red Light devices. The research cited reflects independent peer-reviewed studies and does not imply that any Mito Red Light product has been evaluated, approved, or cleared by the FDA or any other regulatory body for the diagnosis, treatment, cure, or prevention of any disease or medical condition. Individual results vary. Consult a qualified healthcare professional before beginning any light therapy protocol, particularly if you have a pre-existing medical condition, are pregnant, or are taking photosensitising medications.
Mito Red Light products are general wellness devices. They are not medical devices and have not been evaluated, cleared, or approved by the FDA or any regulatory body for the diagnosis, treatment, cure, or prevention of any disease or medical condition. Any references to peer-reviewed research or clinical studies on this page describe findings from independent scientific literature and do not imply that Mito Red Light devices have been studied, tested, or proven effective for any specific condition. Always consult a qualified healthcare provider before beginning any new wellness routine, particularly if you have a medical condition or are taking medication.
Related articles
More from the hair growth knowledge cluster