MitoPRO+ Series

Award winning panel series - exceptional value as measured by light energy delivered per $ invested. Multi-wavelength design better targets peak bioactive spectra.
Regular price $369
Sale price Regular price

The Best in Red Light Therapy

The Best in Red Light Therapy
Industry Leader

Industry Leader

Our patent pending technology is trusted by more professionals than any other brand. With unmatched selection, find the right solution for your goals and budget.
Independently Tested

Independently Tested

All Mito Red Light devices undergo professional diagnostic testing. We guarantee the power, spectra and performance and provide highly accurate data to guide your usage.
Superior Design

Superior Design

Patent-pending technology. High Power, Low EMF and Flicker Free! ETL Certified meeting the highest electrical safety standards.

Size
60 Day Risk-Free Trial
Details

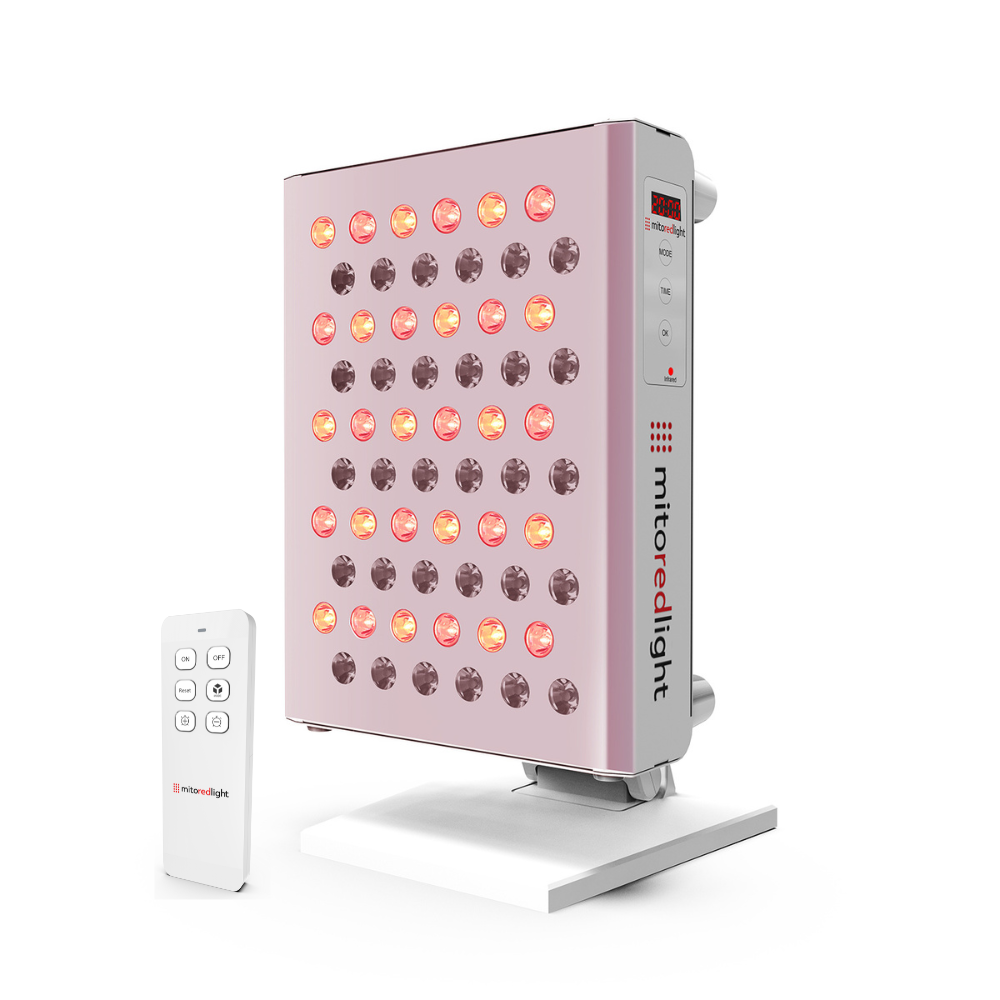
Ranked #1 in an exhaustive comparison series the unique quad wavelength design is aimed at improving Cytochrome C Oxidase (CCOX) activity by better targeting CCOX peak action spectra.

Learn more about the science behind the MitoPRO+ in our article:

MitoPRO+ Series - Advanced Red & Near Infrared Light Therapy

For full specs by size and array scroll down to the "Compare Models" section below.

Specifications

LEDs: 50% Red and 50% Near Infrared (NIR)
LED Peak Wavelengths: 25% 630nm, 25% 660nm, 25% 830nm, 25% 850nm

ESPEO™ Spectral Range: 590nm-700nm, 780nm-900nm

Tabletop stand included with MitoPRO 300+.  

Universal Stand sold separately (not required for use). 

Floor Stand sold separately.

Click for assembly videos and user manual.

Mega+ Panel install options: Floor mount (secure to wall with L bracket), vertical stand or horizontal stand. 

For full specs by size and array, scroll down to the "Compare Models" section below.

Certifications
  • BSCI
  • ISO9001
  • ISO14001
  • ISO45001
  • MDSAP
  • ISO 13485
Independent Third-Party Testing Results
CLICK TO VIEW
What's Included
  • 1 x Remote Control
  • 1 x Power Cable
  • 1 x Detailed User Manual
  • 1 x Opaque Protective Goggles
  • 1 x Mito Red IR3 Glasses
  • 1 x Tabletop Stand (300+ only)

(300+, 750+, 1500+)

  • 1 x Over-The-Door Hook
  • 1 x Steel Hanging Cables
  • 4 x Vinyl Hanging Straps

(Mega+)

  • 1 x Steel L bracket (for floor to wall install)

***Vertical or Horizontal Stand and Floor Stand sold separately (not required for use).

Fast, Free Shipping
Fast, Free Shipping
Class II FDA
Class II FDA
Full Warranty
Full Warranty
60 Day Trial Period
60 Day Trial Period
Superior Design
Superior Design
Financing Available
Financing Available

Compare Models

MitoPRO 300
MitoPRO 300+
$369.00
Dimensions
11" x 10" x 3"
LED Peak Wavelengths
630nm, 660nm, 830nm, 850nm
LED Count
60
Irradiance at 6 Inches (mW/cm2)
>130
Fluence (Joules/cm2/minute)
2.7
Weight
7 lb
Warranty
3 years
Lens Beam Angle
60 Degrees
Power Consumption
90w
Best Used For
Targeted
MitoPRO 750
MitoPRO 750+
$669.00
Dimensions
22" x 10" x 3"
LED Peak Wavelengths
630nm, 660nm, 830nm, 850nm
LED Count
150
Irradiance at 6 Inches (mW/cm2)
>165
Fluence (Joules/cm2/minute)
3.3
Weight
15 lb
Warranty
3 Years
Lens Beam Angle
60 Degrees
Power Consumption
200w
Best Used For
Half Body
MitoPRO 1500
MitoPRO 1500+
$1,169.00
Dimensions
42" x 10" x 3"
LED Peak Wavelengths
630nm, 660nm, 830nm, 850nm
LED Count
300
Irradiance at 6 Inches (mW/cm2)
>170
Fluence (Joules/cm2/minute)
3.4
Weight
25 lb
Warranty
3 Years
Lens Beam Angle
60 Degrees
Power Consumption
400w
Best Used For
Mostly Full Body
MitoPRO 750+ & 1500+
$1,739.00
Dimensions
64" x 10" x 3"
LED Peak Wavelengths
630nm, 660nm, 830nm, 850nm
LED Count
450
Irradiance at 6 Inches (mW/cm2)
>170
Fluence (Joules/cm2/minute)
3.4
Weight
40 lb
Warranty
3 Years
Lens Beam Angle
60 Degrees
Power Consumption
600W
Best Used For
Full Body
MitoPRO Mega
MitoPRO Mega+
$2,499.00
Dimensions
64" x 17" x 3"
LED Peak Wavelengths
630nm, 660nm, 830nm, 850nm
LED Count
600
Irradiance at 6 Inches (mW/cm2)
>130
Fluence (Joules/cm2/minute)
2.5
Weight
60 lb
Warranty
3 Years
Lens Beam Angle
60 Degrees
Power Consumption
880W
Best Used For
Full Body
2x MitoPRO 750+ & 1500+
$3,399.00
Dimensions
64" x 20" x 3"
LED Peak Wavelengths
630nm, 660nm, 830nm, 850nm
LED Count
900
Irradiance at 6 Inches (mW/cm2)
>170
Fluence (Joules/cm2/minute)
3.4
Weight
80 lb
Warranty
3 Years
Lens Beam Angle
60 Degrees
Power Consumption
1200W
Best Used For
Full Body
* Based on consumer level (solar) light meters. For comparison and reference purposes only.
** Based on professional, independent laboratory testing. Can guide dosing in concert with the guidelines in the user manual.
The MitoPRO+ Advantage

The MitoPRO+ Advantage

Science Driven

Science Driven

Available only from Mito Red, the award-winning MitoPRO+ series incorporates the four most bio-active wavelengths 630nm / 660nm (Red) and 830nm / 850nm (Near Infrared). This unique configuration drives enhanced efficacy by delivering increased light energy at the parts of the spectra which maximize cytochrome c oxidase activation.

Flexibility

Flexibility

Harness the power of red light (630nm/660nm) alone to target specific concerns, utilize Near Infrared (830nm/850nm) for deep tissue penetration, or combine both wavelengths simultaneously for a comprehensive session.

Control Panel

Control Panel

With Mito Red Light, managing your sessions is a breeze thanks to our intuitive digital control panel equipped with a handy timer function. Set your preferred session duration, confirm with a simple press, and then kick back and unwind while our state-of-the-art technology handles the rest.

Unparalleled Choice

Unparalleled Choice

Discover unparalleled choice with Mito Red Light, offering a diverse selection of six different-sized options and versatile mounting solutions to suit your preferences perfectly. Plus, with options for floor, vertical, and horizontal stands, you have the flexibility to customize your setup according to your space and lifestyle.

Buy with Confidence

Commitment to Quality

Commitment to Quality

At Mito Red, our commitment to quality and continuous improvement is at the heart of what we do day in and day out. Our red light therapy products undergo the most rigorous manufacturing and quality control processes in the industry. Manufacturing is done at scale to improve efficiency. All components are individually inspected before going into production.

Advanced Manufacturing Process

Advanced Manufacturing Process

At Mito Red Light, we utilize cutting-edge automated patching technology for our PCB boards, ensuring exceptional quality and longevity. This advanced process precisely places and secures components, minimizing the risk of errors and enhancing overall performance. Our meticulous attention to detail in manufacturing guarantees that each device delivers consistent, high-quality results. By leveraging state-of-the-art techniques, we ensure that Mito Red Light products stand out for their reliability and durability, meeting the highest standards in the industry.

Attention to Detail

Attention to Detail

At Mito Red Light, we leave no room for compromise, meticulously inspecting and testing each PCB board to ensure unparalleled quality. Our rigorous process guarantees reliability and performance, meeting the highest industry standards. With every product, you can trust in the durability and excellence that define Mito Red Light.

Meticulous Craftsmanship

Meticulous Craftsmanship

At Mito Red Light, we take pride in our meticulous craftsmanship. All LED lens packages are individually inspected and assembled by hand, ensuring exceptional quality. Similarly, all housings undergo individual inspection and hand assembly, guaranteeing durability.

Built to Last

Built to Last

At Mito Red Light, our industry-leading aging testing ensures your light will run smoothly for years to come. All finished products are individually inspected and tested, guaranteeing exceptional performance and durability. Our rigorous quality control process ensures you receive a reliable and high-performing product every time.

Get More Out of Your MitoPRO+

Before & After Examples

View All Reviews
Disclaimer: Individual results may vary